Task guide / PC Early Access · November 2026
How to draw usable trails with the right difficulty
Open the slope/difficulty overlay before drawing a Regular trail. Connect the lift’s upper hub to a reachable lower hub, follow a downhill line, and select a rating that fits the actual terrain. Widen only where you need it and read the clearing quote; changing a blue label does not flatten a steep slope.
Updated 2026-11-13 · PC Early Access · November 2026
Follow these steps
Choose the descent with overlays first
Turn on terrain difficulty and contour lines. Look for a downhill route from your chosen upper station to the base, including a manageable lower section. Consider which skill group needs this run. Colour conventions can differ: official options include Alpine and French & Nordic styles, so use your current legend rather than assuming the video’s blue/red colours match every setting.
Draw between the actual hubs
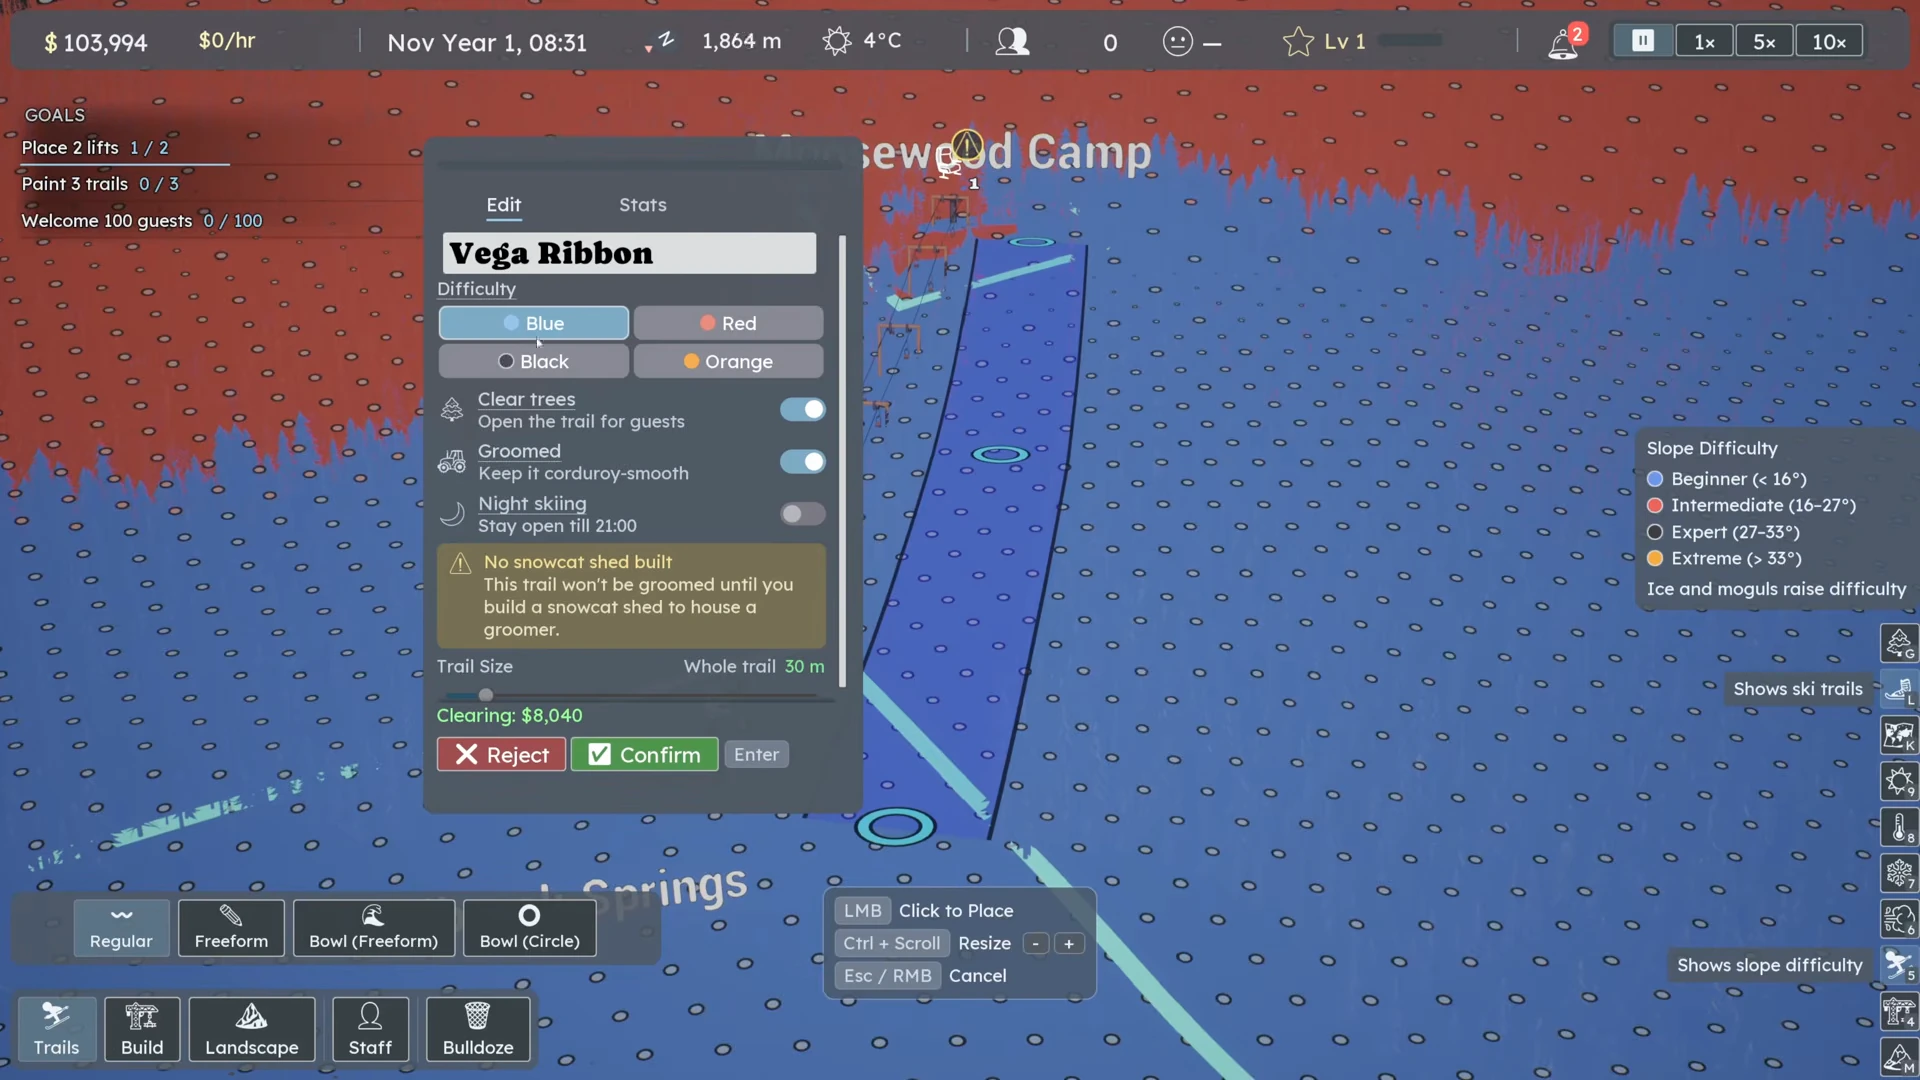
Open Trails → Regular. Place the start in the top hub, add points down the slope and finish in the destination hub. Watch the preview and any unusable-trail explanation. When both ends sit in hubs the confirm check becomes available; Enter can confirm. Avoid routing a trail so flat or uphill that it cannot provide the descent you intend.
 Open full-size image ↗
Use the preview and terrain overlay before choosing a rating. The old frame shows Ctrl + Scroll; current point resizing uses LMB + Scroll after CL7738. Nivarias Part 1, 06:10; exact build not shown. Match the selected rating to the terrain
Choose the rating in the trail editor. The game does not automatically replace the rating you selected when trees or terrain make the actual run harder. In Part 1, the author later finds a blue-labelled run crossing red terrain and changes its rating after too-hard complaints. Recheck the whole run, especially a steep middle section hidden by a gentle finish.
Set width and check the clearing bill
Use the trail width controls for the selected point, or resize the whole trail with no point selected. The current point-resize hint is LMB + Scroll; scrolling alone zooms. Inspect the quoted tree clearing before confirming. Wider runs and a route through dense forest can cost more, so narrow or reroute the plan if it consumes the money needed for operations.
Offer terrain people can actually reach and want
Read guest skill and complaints at the hub served by this lift. Add a suitable easier or harder descent where the missing group can reach it. Maintain some variety in snow experience as well: Part 2 deliberately leaves a red run ungroomed after a no-ungroomed-trails complaint. This is a demand response, not a rule to leave every run ungroomed.
Confirm and inspect a real descent
Confirm the trail, clear the quoted trees where appropriate and advance time with usable snow and a staffed lift. Follow a skier leaving the upper hub, taking the intended run and reaching its lower connection. Reopen Edit if a fault remains; official notes put the reason for an unusable trail there.
What success looks like
The trail confirms between its hubs, has no unexplained unusable warning, and a skier with a suitable skill level can take it to the intended lower area. Its label and actual terrain no longer contradict each other.
If it does not work
If confirmation stays unavailable, recheck both endpoints and the preview’s reason before adding random points. If guests say the run is too hard, inspect steep sections and dense trees as well as the chosen label. If a current terrain complaint names a base or hub, investigate that location rather than repainting an unrelated run across the map.
Sources and version notes
- Nivarias Part 1: Regular trails, width and rating correction ↗
Sponsored public full-game footage; exact build not shown. Not our own playtest.
- Nivarias Part 2: leave one run ungroomed for demand ↗
Sponsored public full-game footage; exact build not shown. Not our own playtest.
- Official CL6797 patch notes ↗
- Official CL7738 patch notes ↗
- Official CL7671 patch notes ↗
- Official CL6119 patch notes ↗